~3.4까지의 강의
이제부터 투두앱을 만들어보자.
원하는 위치로 가서 expo init WorkHardTravelHardApp --npm 후, blank를 선택한다.
그리고, 마찬가지로 열어준다.
이제 어플 만드는걸 빨리 시작해보자.
App.js
import { StatusBar } from "expo-status-bar";
import React from "react";
import {
  StyleSheet,
  Text,
  View,
  TouchableOpacity,
  TouchableHighlight,
  TouchableWithoutFeedback,
  Pressable,
} from "react-native";
import { theme } from "./colors";

export default function App() {
  return (
    <View style={styles.container}>
      <StatusBar style="auto" />
      <View style={styles.header}>
        <TouchableOpacity>
          <Text style={styles.btnText}>Work</Text>
        </TouchableOpacity>
        <TouchableOpacity>
          <Text style={styles.btnText}>Travel</Text>
        </TouchableOpacity>
      </View>
    </View>
  );
}

const styles = StyleSheet.create({
  container: {
    flex: 1,
    backgroundColor: theme.bg,
    paddingHorizontal: 20,
  },
  header: {
    justifyContent: "space-between",
    flexDirection: "row",
    marginTop: 100,
  },
  btnText: {
    fontSize: 38,
    fontWeight: "600",
    color: "white",
  },
});
먼저 어플의 헤더를 만들기 위해 Work, Travel이라는 단어를 적는다.
React Native는 padding을 가로 혹은 세로로 줄 수 있다.(paddingHorizontal)
헤더의 direction은 row로 한다.
색을 만들어주기 위해서 colors.js라는 새 파일을 만들어보자.
colors.js
export const theme = {
    bg: "black",
    grey: "#3A3D40",
  };
이렇게 함으로써 theme.bg라고 하면 손쉽게 할 수 있다.
많이 사용하는 컴포넌트는, Tochableopacity 인데, 이벤트를 누를 준비가 된 것이다.
opcatiy가 들어간 것은 투명도가 들어간 것이기 때문이다.
그래서 누르면 투명해진다. 누르면 애니메이션이 들어간다는 것이다.
그리고 TochableHighlight는 더 많은 속성들이 있다.
눌렀을 때의 투명도를 설정할 수 있다.

Pressable은 눌렀을 때 실행되는 이벤트를 말한다.
onpressin은 들어갈 때, out은 나올 때 말하는 것이다.
더 섬세한 설정을 할 수 있다.
이제 두 개를 왔다갔다 하는 것을 만들어 보도록하자.
App.js
export default function App() {
  const [working, setWorking] = useState(true);
  const [text, setText] = useState("");
  const travel = () => setWorking(false);
  const work = () => setWorking(true);
  const onChangeText = (payload) => setText(payload);
  return (
    <View style={styles.container}>
      <StatusBar style="auto" />
      <View style={styles.header}>
      <TouchableOpacity onPress={work}>
          <Text
            style={{ ...styles.btnText, color: working ? "white" : theme.grey }}
          >
            Work
          </Text>
      </TouchableOpacity>
          <TouchableOpacity onPress={travel}>
          <Text
            style={{
              ...styles.btnText,
              color: !working ? "white" : theme.grey,
            }}
          >
            Travel
          </Text>
        </TouchableOpacity>
      </View>
      <TextInput
        onChangeText={onChangeText}
        value={text}
        placeholder={working ? "Add a To Do" : "Where do you want to go?"}
        style={styles.input}
      />
    </View>
  );
}
work에 상태가 있는지 없는지 알려주는 state를 만들어 보도록 하기위해서 setWorking을 만든다.
그래서 누군가 work를 누르면 work함수를 호출하는 것이다.
그리고 이것을 확인해서 스타일도 변경할 수 있도록 해준다.
여기서는 TextInput을 해보자.
TextInput에는 많은 속성이 있다. 이게 user가 사용할 수 있는 것이다.
text area같은 것은 없다.
콤마를 쓰고, TextInput을 쓰면 된다.
그리고, placeholder를 둔다.
keyboardtype도 정해줄 수 있다.
만약, email-address인 경우 자판에 @가 생긴다.
phone pad는 * ,#이 생긴다.
returnkeytype
사용하면 완료의 모양을 바꿔줄 수 있다.
onchangetext를 사용하면 텍스트가 바뀌는 것을 확인할 수 있다.
autocapitalize는 대문자인데 기본값으로 대문자가 첫글자이지만 변경할 수 있다.
space를 눌러도 대문자를 입력하도록 나온다.
text, settext로 해서 user가 저장한 값을 저장하다. user가 무언가를 입력하면 저장하도록 하자.
이제 user가 버튼을 누르는 것을 감지해보도록 하자.
submit을 누르면 버튼을 감지하도록 할 수 있다. 그래서 addToDo라는 함수를 만든다.
<TextInput
      onSubmitEditing={addToDo}
        onChangeText={onChangeText}
        returnKeyType="done"
        value={text}
        placeholder={working ? "Add a To Do" : "Where do you want to go?"}
        style={styles.input}
      />
returnKeyType을 done으로 한다.즉, 추가하지 않으면 취소하도록 하는 것도 해보자.
const addToDo = () => {
    if (text === "") {
      return;
    }
    const newToDos = Object.assign({}, toDos, {
      [Date.now()]: { text, work: working },
    });
    setToDos(newToDos);
    //console.log(toDos);
    setText("");
  };
todo가 비어있다면 아무것도 하지 않고 return한다.
text가 지금 state와 같다면, 즉 ToDo가 비어있지 않다면 ToDo를 저장한다.
text를 빈 공간으로 만든다.
그리고 ToDo들을 위한 state를 만들어보자.
우리는 ToDos object라는 식으로 만든다.
reactJS는 state를 직접 수정하지 않기 때문에, setState라는 것을 해줘야 한다.
즉 항상 새로운 object는 newToDos를 보내주어야 한다.
ToDos가 있는데 work:true를 추가하면 todo를 변형하는 대신에 새로운 것을 쓴다.
그럼 바로 새로은 object가 될 것이다.
우리 코드에서는 어떻게 쓰면 될까?
next todo를 쓴다. 즉 todo를 변형 시키지 않고 사용한다.
target은 새로 만들어질 object가 될 것이고, 이전 ToDos와 새로운 newToDos를 넣어주면 된다.
이게 work의 ToDos인지 아닌지 넣어줄 것이다. 그것은 working에서 알 수 있을 것이다.
먼저 비어있는 objcet를 결합하고, 새로운ToDo와 합쳤다.
그리고 새로운 ToDo를 console에 찍어보자.

object assign이 잘 이해가 안된다면 es6을 사용하면 된다.
const newToDos = { ...toDos, [Date.now()]: { text, work: working }, };
ToDos의 내용을 새로운 ToDos의 내용과 합쳐보고 싶다.
왜냐면 이것은 state의 setToDos이기 때문이다.
그렇게 하면 objcet를 가진 것을 만드는 것이다.
그래서 콤마를 쓰고 todo를 사용하였다.
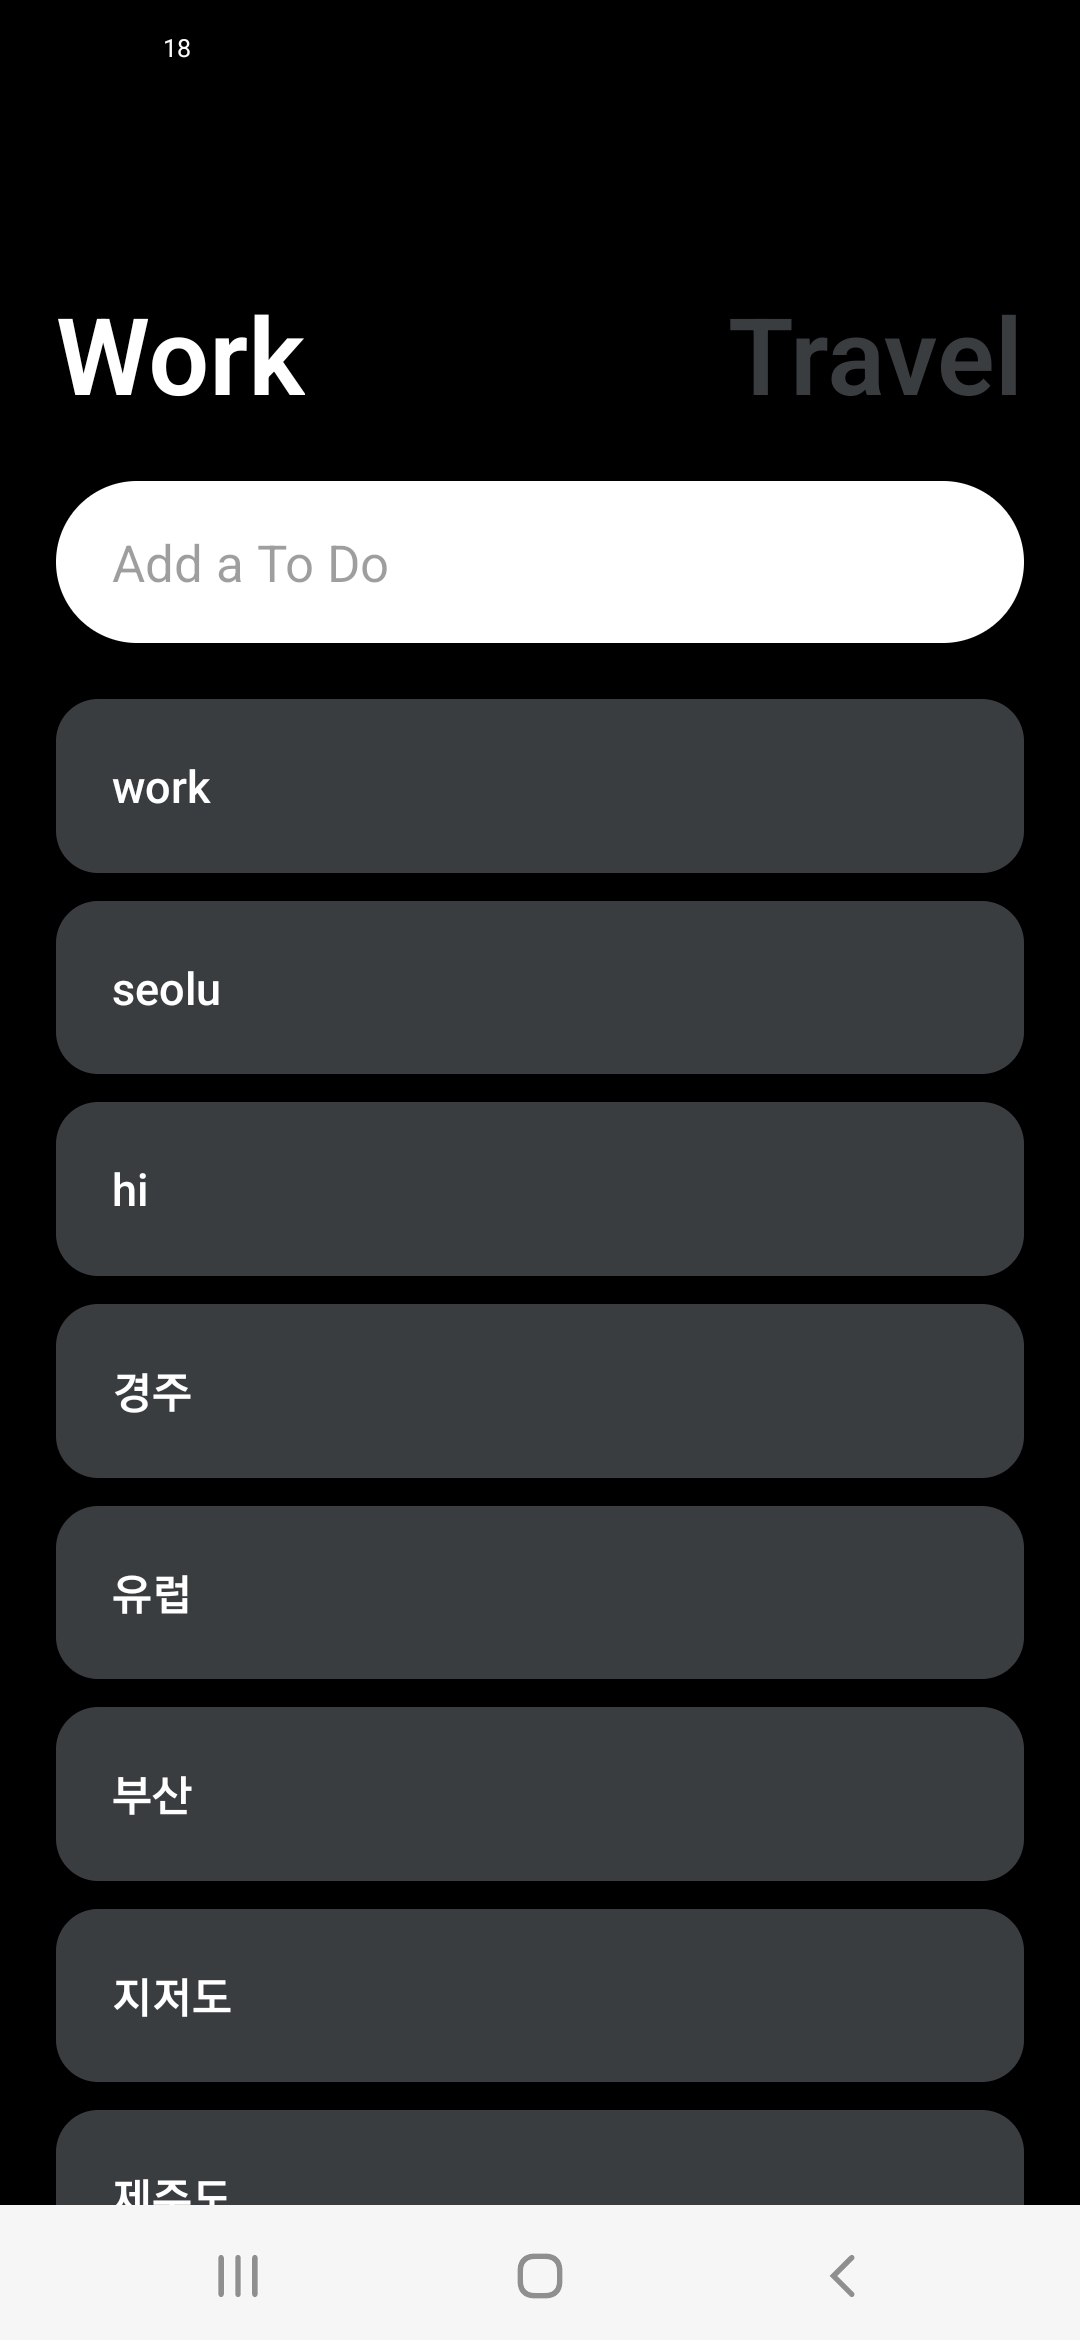
ToDos를 paint할 것인데 먼저 ScrollView를 추가한다.
<ScrollView>
        {Object.keys(toDos).map((key) => (
          <View style={styles.toDo} key={key}>
            <Text style={styles.toDoText}>{toDos[key].text}</Text>
          </View>
        ))}
</ScrollView>
익숙한 방법으로 하려면, map과 같은 방식으로 하면 된다.
결과값을 다른 곳에 넣으면, 여기에는 2개의 키를 가진 objcet가 있다.
map을 사용해서 새로운 것을 해야한다.
우리는 component를 return해야 한다.
우선은 View를 만들 것이다. key를 써주고, text를 만든다.
우리는 ToDo안에 있는 key들을 다룬다.
그리고 Toos.text를 보여준다.
즉, 어려운 것은 아니다.
전체코드
App.js
import { StatusBar } from "expo-status-bar";
import React, { useState } from "react";
import {
  StyleSheet,
  Text,
  View,
  TouchableOpacity,
  TextInput,
  ScrollView,
} from "react-native";
import { theme } from "./colors";

export default function App() {
  const [working, setWorking] = useState(true);
  const [text, setText] = useState("");
  const [toDos, setToDos] = useState({});
  const travel = () => setWorking(false);
  const work = () => setWorking(true);
  const onChangeText = (payload) => setText(payload);
  const addToDo = () => {
    if (text === "") {
      return;
    }
    const newToDos = {
      ...toDos,
      [Date.now()]: { text, work: working },
    };
    setToDos(newToDos);
    //console.log(toDos);
    setText("");
  };
  return (
    <View style={styles.container}>
      <StatusBar style="auto" />
      <View style={styles.header}>
      <TouchableOpacity onPress={work}>
          <Text
            style={{ ...styles.btnText, color: working ? "white" : theme.grey }}
          >
            Work
          </Text>
      </TouchableOpacity>
          <TouchableOpacity onPress={travel}>
          <Text
            style={{
              ...styles.btnText,
              color: !working ? "white" : theme.grey,
            }}
          >
            Travel
          </Text>
        </TouchableOpacity>
      </View>
      <TextInput
      onSubmitEditing={addToDo}
        onChangeText={onChangeText}
        returnKeyType="done"
        value={text}
        placeholder={working ? "Add a To Do" : "Where do you want to go?"}
        style={styles.input}
      />
      <ScrollView>
        {Object.keys(toDos).map((key) => (
          <View style={styles.toDo} key={key}>
            <Text style={styles.toDoText}>{toDos[key].text}</Text>
          </View>
        ))}
      </ScrollView>
    </View>
  );
}

const styles = StyleSheet.create({
  container: {
    flex: 1,
    backgroundColor: theme.bg,
    paddingHorizontal: 20,
  },
  header: {
    justifyContent: "space-between",
    flexDirection: "row",
    marginTop: 100,
  },
  btnText: {
    fontSize: 38,
    fontWeight: "600",
  },
  input: {
    backgroundColor: "white",
    paddingVertical: 15,
    paddingHorizontal: 20,
    borderRadius: 30,
    marginVertical: 20,
    fontSize: 18,
  },
  toDo: {
    backgroundColor: theme.grey,
    marginBottom: 10,
    paddingVertical: 20,
    paddingHorizontal: 20,
    borderRadius: 15,
  },
  toDoText: {
    color: "white",
    fontSize: 16,
    fontWeight: "500",
  },
});
colors.js
export const theme = {
    bg: "black",
    grey: "#3A3D40",
    toDoBg: "#5C5C60",
};'Application > React Native' 카테고리의 다른 글
| [React Native 101] #7. PUBLISHING OUR APPS (0) | 2022.07.26 |
|---|---|
| [React Native 101] #6. Persist&Delete (0) | 2022.07.25 |
| [React Native 101] #4. Location & Weather & Icons (0) | 2022.07.21 |
| [React Native 101] #3. Styles (2) | 2022.07.18 |
| [React Native 101] #2. Rules & Packages (0) | 2022.07.18 |


댓글