~ 이번 팀플의 메인 주제인 구름 분류 하기
(저번에 에러는 잡아서, 이번에는 제대로 정리+오류 잡기에 목표를 두고 하는 걸로!) ~
데이터는 캐글데이터 사용! 기본적인 코드는 블로그 참고
1. 사용할 모듈 import
from PIL import Image
import os, glob, numpy as np
import os
from sklearn.model_selection import train_test_split
import os, glob, numpy as np
from keras.models import Sequential
from keras.layers import Conv2D, MaxPooling2D, Dense, Flatten, Dropout
from keras.callbacks import EarlyStopping, ModelCheckpoint
import matplotlib.pyplot as plt
import tensorflow as tf
from keras.backend import set_session as K
from tensorflow.keras.preprocessing.image import img_to_array, load_img, array_to_img
from keras.preprocessing.image import ImageDataGenerator
import libarchive
import pydot
import cartopy
기본적으로 사용할 모듈이 아주 많다. 물론 이걸 그대로 하면 오류가 나서 알아서 설치해줄것 !
2. 드라이브에 마운트 하기
from google.colab import drive
drive.mount('/content/drive')
3. ImageDataGenerator 사용
1) ImageDataGenerator를 활용하여 각 구름 종류별 데이터의 수를 1500개 이상으로 늘리기
def IDG(fname):
    ImageDG = ImageDataGenerator(
        rescale=1. / 255,
        rotation_range=15,
        width_shift_range=0.1,
        height_shift_range=0.1,
        horizontal_flip=True,
        zoom_range=0.1,
        fill_mode='nearest'
    )
    img = tf.keras.preprocessing.image.load_img(fname)
    x = img_to_array(img)
    x = x.reshape((1,) + x.shape)
    i = 0
    save = "/content/drive/MyDrive/Colab Notebooks/cloud"  # Modified save path based on the file's directory


    for batch in ImageDG.flow(x, batch_size=1, save_to_dir=save, save_prefix='new',
                              save_format='jpg'):
        i += 1
        if i > 7:
            break
IDG 함수를 정의해 ImageDataGenerator 객체를 생성한다. 이 객체는 이미지 데이터 증강을 위한 다양한 옵션을 설정하는 데 사용된다.
tf.keras.preprocessing.image.load_img 함수를 사용해 fname에 있는 이미지를 로드한 후,
img_to_array 함수를 사용해 넘파이 배열로 변환한다.
데이터 증강을 수행하는 반복문을 설정한다. 생성된 배치 이미지는 save_to_dir로 지정한 경로에 저장한다.
여기서 저장되는 위치는 먼저 만들어져 있어야 한다.
나는 여기서 여러 가지 가설을 세워서, 값들을 변경해 주었다.
folder_path = '링크'
file_list = os.listdir(folder_path)

for filename in file_list:
    filepath = os.path.join(folder_path, filename)
    IDG(filepath)
folder_path에 저장된다.
4. Image 데이터를 학습 데이터로 변환
img_dir =  "data/train"
categories = os.listdir(img_dir)
num_classes = len(categories)

image_w = 64  #64*64*3 사이즈로 조정
image_h = 64

pixel=  image_w * image_h * 3
X=[]
y=[]

for idx, cat in enumerate(categories): # 카테고리를 enumerate를 이용하여 카테고리와 인덱스 사용
    img_dir_detail = img_dir + '/' + cat
    files = glob.glob(img_dir_detail + "/*.jpg")
    for i,f in enumerate(files):
        try:
            img = Image.open(f)
            img = img.convert('RGB')
            img = img.resize((image_w,image_h)) #이미지의 사이즈를 조정
            data = np.asarray(img)
            X.append(data)
            y.append(idx)
            if i % 300 == 0 : # 300번쨰 마다 프린트
                print(cat, " : ", f)
        except:
            print(cat,str(i)," 번째에서 에러")

X = np.array(X)  #array로 변환
y = np.array(y)  #array로 변환

X_train, X_test, y_train, y_test = train_test_split(X,y, test_size = 0.3) #train test 구분
이미지 파일들이 저장될 디렉터리를 지정한 후, 이미지의 가로길이와 세로길이를 지정한다.
이미지 파일들을 순회하면서 이미지를 열고, RGB 형식으로 변환하고, 리사이징 한다.
5. 학습데이터 가공
print(X_train.shape) # 데이터 크기 확인
print(y_train.shape)
print(X_test.shape)
print(y_test.shape)

# img를 array로 변환시 0~255의 값을 가지는데 이것을 0~1로 변환
X_train = X_train.astype(float) / 255.0
X_test = X_test.astype(float) / 255.0

from keras.utils import to_categorical
# 기존의 1의 값을가지는 y값을 [0,1,0,0,---]와 같이 변환
y_train = to_categorical(y_train)
y_test = to_categorical(y_test)
미지 데이터의 픽셀 값 정규화를 위해서 입력 데이터 정규화를 진행한다.
그 후 대상 레이블을 범주형 데이터로 변환한다.
6. 모델 구축
1) 모델 확인
image_w = 64
image_h = 64

with tf.device('/device:GPU:0'):
    model = Sequential()

    model.add(Conv2D(32, (3,3), padding="same", input_shape=X_train.shape[1:], activation="relu"))
    model.add(MaxPooling2D(pool_size=(2,2)))
    model.add(Dropout(0.25))

    model.add(Conv2D(64, (3,3), padding="same", activation="relu"))
    model.add(MaxPooling2D(pool_size=(2,2)))
    model.add(Dropout(0.25))

    model.add(Flatten())
    model.add(Dense(256, activation='relu'))
    model.add(Dropout(0.5))
    model.add(Dense(num_classes, activation='softmax')) # 출력 레이어 수정

    model.compile(loss='categorical_crossentropy', optimizer='adam', metrics=['accuracy'])

    model_dir = './model'
    model_path = model_dir + "/cloud_classify.model"

    checkpoint = ModelCheckpoint(filepath=model_path, monitor='val_loss', verbose=1, save_best_only=True)
    early_stopping = EarlyStopping(monitor='val_loss', patience=6)
2) 모델 구축 후 학습 시키기
X_train.shape
history = model.fit(X_train, y_train, batch_size=32, epochs=100, validation_split=0.1)
3) 정확도 확인
accuracy = np.mean(history.history['accuracy'])
val_accuracy = np.mean(history.history['val_accuracy'])
loss = np.mean(history.history['loss'])
val_loss = np.mean(history.history['val_loss'])

print(f"평균 정확도: {accuracy:.4f}")
print(f"평균 손실: {loss:.4f}")
print(f"평균 검증 정확도: {val_accuracy:.4f}")
print(f"평균 검증 손실: {val_loss:.4f}")
7. 확인
def weather (label) :
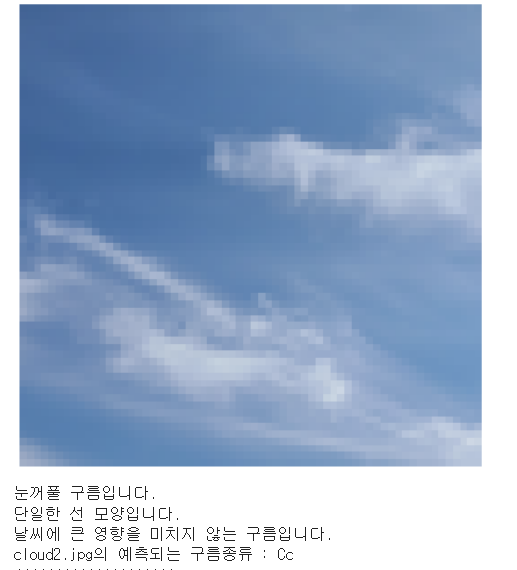
if label == "Cc" :
print("눈꺼풀 구름입니다.")
print("단일한 선 모양입니다.")
print("날씨에 큰 영향을 미치지 않는 구름입니다.")
elif label == "Cb" :
print("눈구름입니다.")
print("세포 형태의 구름입니다.")
print("번개, 천둥, 강한 바람과 폭우가 내릴 수 있습니다. 외출을 자제해주세요!")
elif label == "Ns" :
print("적란운입니다.")
print("수직 형태의 구름입니다.")
print("비, 이슬비가 내릴 수 있습니다. 우산을 챙겨 외출해주세요!")
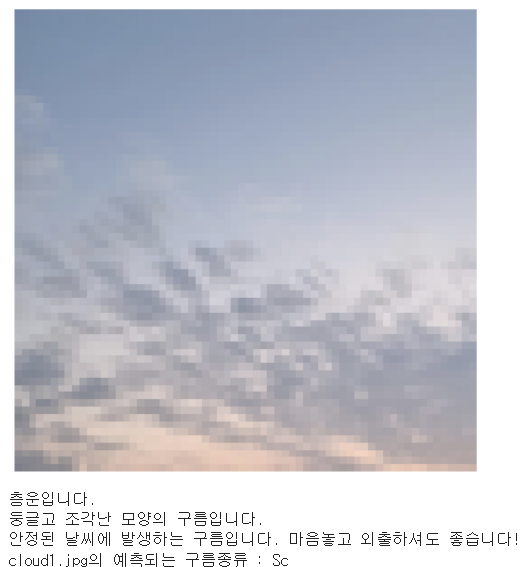
elif label == "Sc" :
print("층운입니다.")
print("둥글고 조각난 모양의 구름입니다.")
print("안정된 날씨에 발생하는 구름입니다. 마음놓고 외출하셔도 좋습니다!")
elif label == "St" :
print("적운입니다.")
print("평평하고 수평으로 퍼진 모양의 구름입니다.")
print("약한 강수나 가벼운 이슬비가 내릴 수 있습니다. 흐림과 안개를 동반합니다. 우산을 챙겨 외출해주세요!")path2 = "비교할 사진 위치"
category = os.listdir("/content/drive/MyDrive/Colab Notebooks/clouddata/train")
image_w = 64
image_h = 64
pixels = image_h * image_w * 3
X = []
filenames = []
files = glob.glob(path2+"/*.*")
for f in files:
img = Image.open(f)
img = img.convert("RGB")
img = img.resize((image_w, image_h))
data = np.asarray(img)
filenames.append(f)
X.append(data)
X = np.array(X)
prediction_test = model.predict(X)
file_index = 0
k=0
for i in prediction_test:
label = i.argmax() # [0.000, 0.000, 0.000, ..., 0.000, 1.000, 0.000] 중 최대값 추출 즉,1값의 인덱스
print("////////////////////")
#사진 나타내기
plt.imshow(X[k])
plt.axis('off')
plt.show()
# 날씨 예측
weather(category[label])
print( filenames[file_index].split('/')[-1] + "의 예측되는 구름종류 : " + category[label])
file_index = file_index+1
k=k+1나는 직접 찍은 사진들로 비교했다.
사실 이렇게 대충 쓸게 아닌 게 나 진짜,,,,,,,, 엄청난 스트레스와 시간을 들여서 팀플을 했다.
깃허브 들어가면 나의 노고를 알 수 있으니 참고할 사람 참고하길!
https://github.com/Jueunkim429/Cloud-cloud
GitHub - Jueunkim429/Cloud-cloud
Contribute to Jueunkim429/Cloud-cloud development by creating an account on GitHub.
github.com
'DeepLearning' 카테고리의 다른 글
| [CutMix] 실습 및 정리 (3) | 2023.05.18 |
|---|

댓글